- PDF
Sort results into groups
- PDF
Sort groups organize recommendations on the result page into different categories. It is therefore a type of grouping. One example is the grouping of wall paints into the sort group colours and brushes category as well as paint rollers into the sort group tools.
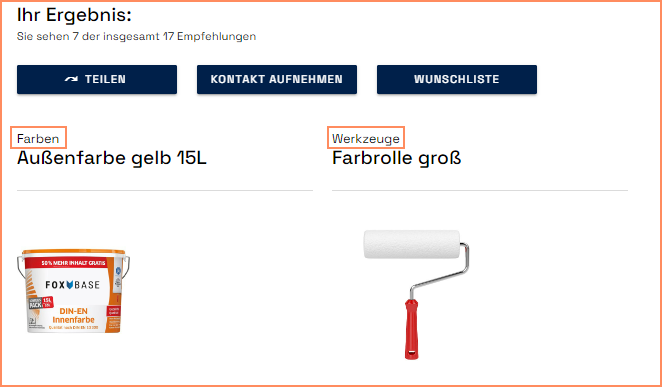
💡The information on the categorization of the recommendations comes from the product data: One column per sort group.
The order of the recommendations is based on the order of the products in the rows of the product data (i.e. data values of 0 or no value and 1 = no ranking). Alternatively, data values from 1 in ascending order (e.g. 1 - 10) influence the order of the recommendations in the sort group (i.e. with ranking).
💡The value 0 or an empty cell means that the recommendation does not belong to the sort group. If the value is 1, the recommendation appears in the sort group.
Create sort groups without ranking
Create a column in the product data for each sort group and enter a value of 0 (or no value) or 1 for each row.
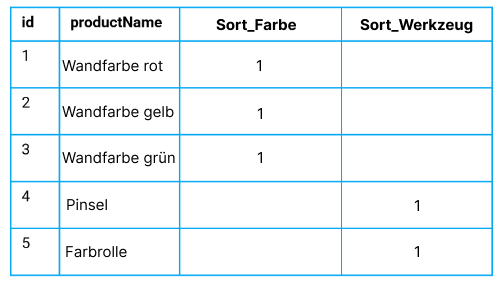
Save the file in CSV UTF-8 format and import it into the workbench (see related articles).
Open Result Page > Sort Groups in the wWorkbench and click on +Add Sort Group.
Enter the name of the sort group under Sort group label.
Select the data column under Product attribute.
Repeat steps 3 to 5 for each sort group.
Workbench:
.png)
Result Page:

Create sort groups with ranking
Create a column in the product data for each sort group and enter values in ascending order from 1 to X for each row.
.png)
Save the file in CSV UTF-8 format and import it into the Wworkbench (see related articles).
Open Result Page > Sort Groups in the workbench and click on +Add Sort Group.
Enter the name of the sort group under Sort group label.
Select the data column under Product attribute.
Under Sort function, select the option ASC for an ascending order or DSC for a descending order.
Repeat steps 3 to 6 for each sort group.
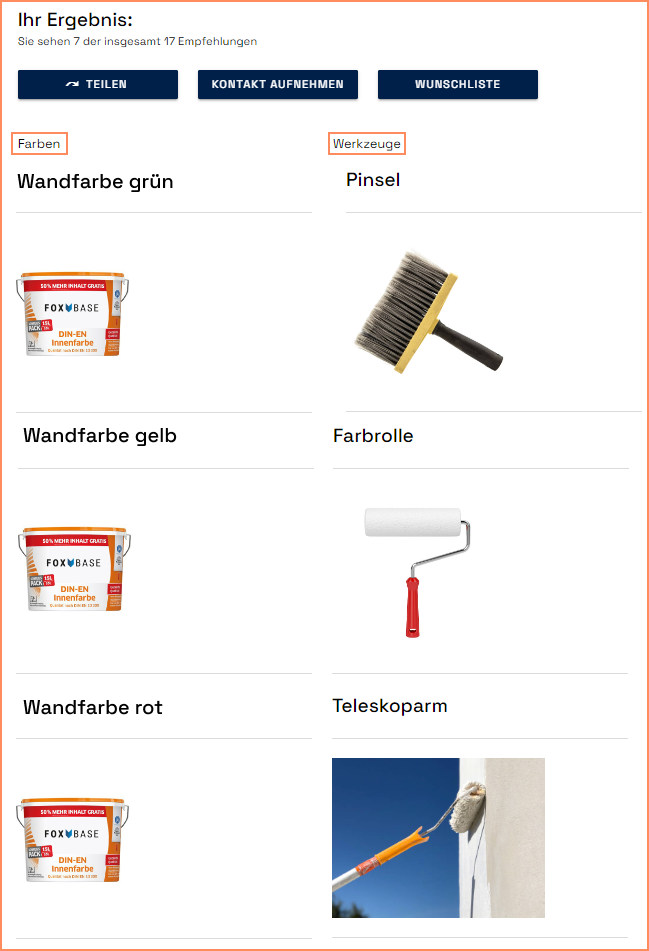
Result page in ascending order (ASC):
Configure product quantity display
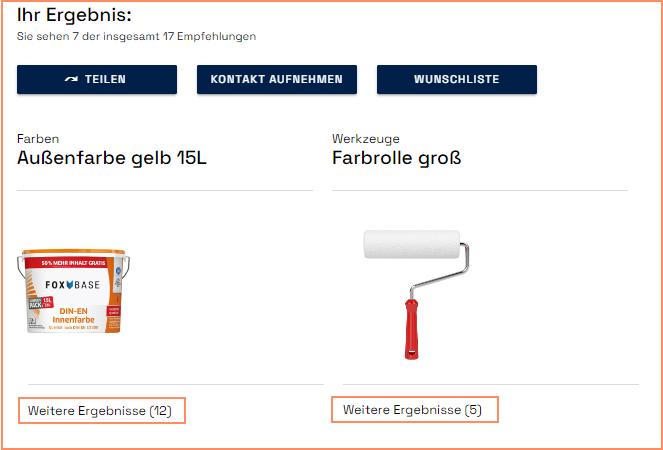
Each sort group contains all recommendations that match the respective answer combination. The workbench allows you to set the number of recommendations visible when loading the result page. Selector users can click to expand other sort group products. The number of these recommendations loaded with a click can also be configured.
Set display of visible products
Click to open the sort group.
Enter the desired number in the Maximum shown field .
💡The default setting is 1. This means that the sort group shows a recommendation when the result page is loaded.
Set display of products loaded by clicking
Click to open the sort group.
Enter the desired number in the Maximum loaded field .
💡The default setting is 0 and stands for infinity. This means that one click loads all other available recommendations.
Prioritize products from multiple sort groups
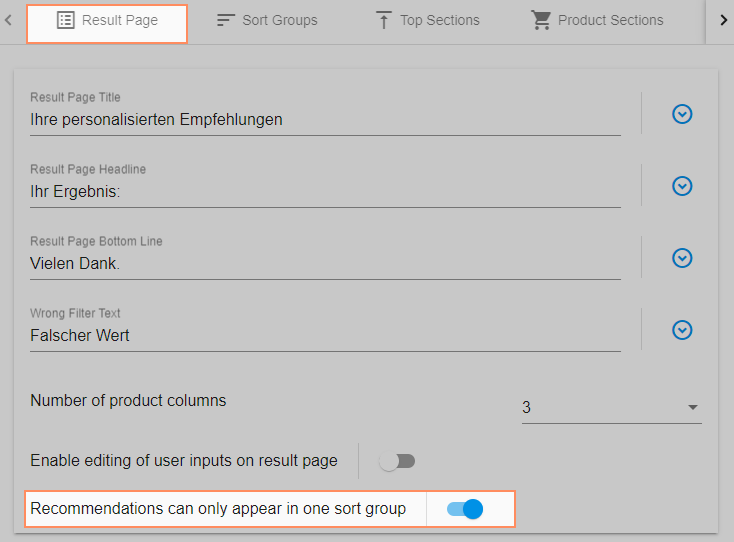
If recommendations in the data contain an assignment to multiple sort groups, these will appear in each assigned sort group on the result page . To ensure that each recommendation only occurs in one sort group, perform the following steps:
Open the Result Page section of the workbench.
In the tab Result Page, activate the toggle Recommendations can only appear in one sort group.
Switch to the tab Sort Groups.
Enter a numerical value in the Unique Priority field for each sort group to define the priority of the sort group.
💡Prioritization is carried out according to ascending numbers. Recommendations that are assigned to several sort groups on the data side only appear in the sort group with the lowest numbered Unique Priority (e.g. 1).

