- PDF
Create fields & display on the result page
- PDF
To be able to display calculation results or text elements on the results page, you must first create the desired field. We distinguish between global and product-specific fields.
💡 Global vs. product-specific fields
A global field can be displayed on the result page both in the Top & Bottom Section and in the Product Section. You can display fixed and dynamic texts as well as calculation results.
In contrast, the platform can only display a product-specific field within the product section. As with the global field, you can also display texts and calculations here. However, as the name suggests, a product-specific field refers to the individual recommendations. On the one hand, you have the option of applying the rules equally to all recommendations. On the other hand, you can configure an individual rule for each individual product.
1. Configure a global field
1.1 Create global field
In this example, you create a text field in the rules that is displayed on the results page. The content will be the pre-defined phrase Premium license has been selected.
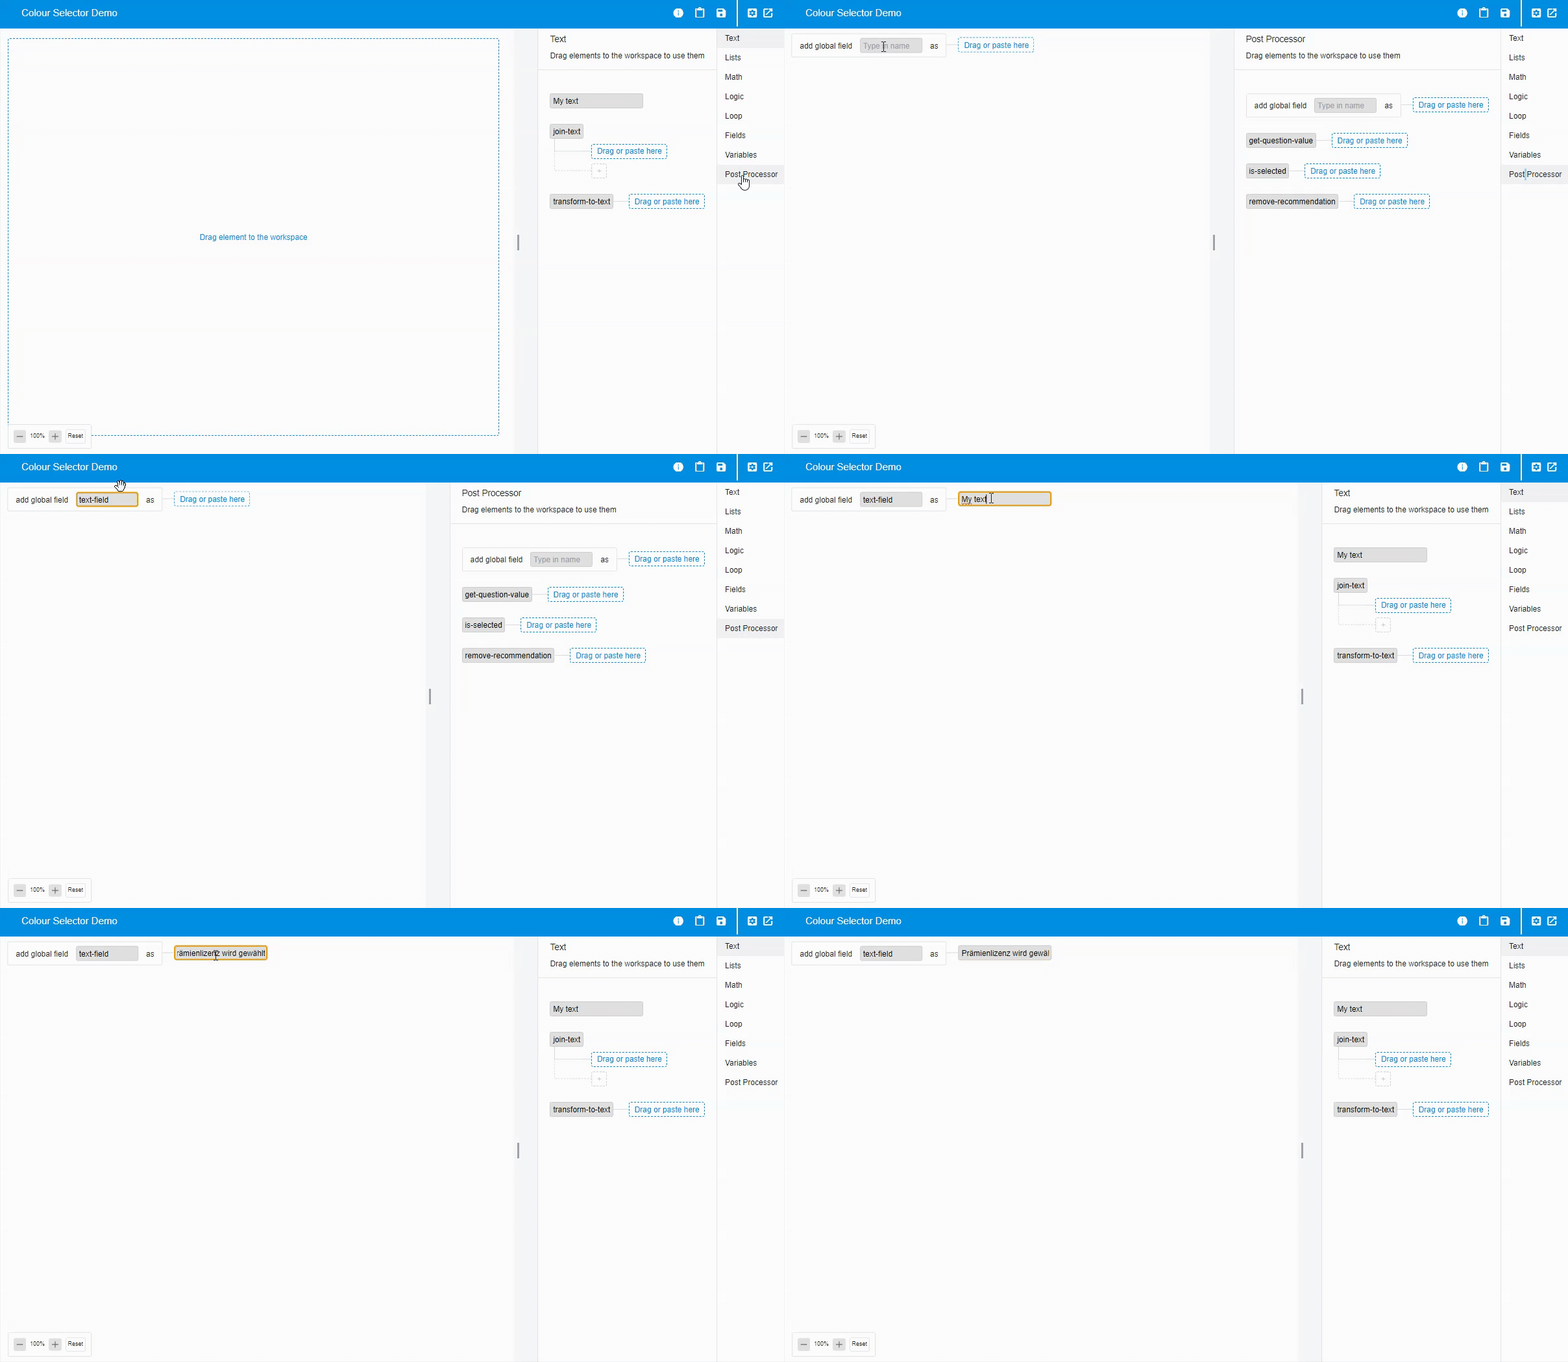
Open the rule and click on Post Processor in the right-hand navigation.
.png)
Drag the element add global field into the workspace.
Under Type in name, add the name of the field (example: text-field).
Switch to Text in the navigation and drag My text into add global field.
Type in the text you want to display on the Result Page (example: Premium license has been selected).

1.2 Show global field on the results page
After you have created a global field, you must embed the field within the result page. This ensures that the field is displayed on the result page after the questions have been answered.
1.2.1 Show global field above / below the product recommendations (top or bottom sections)
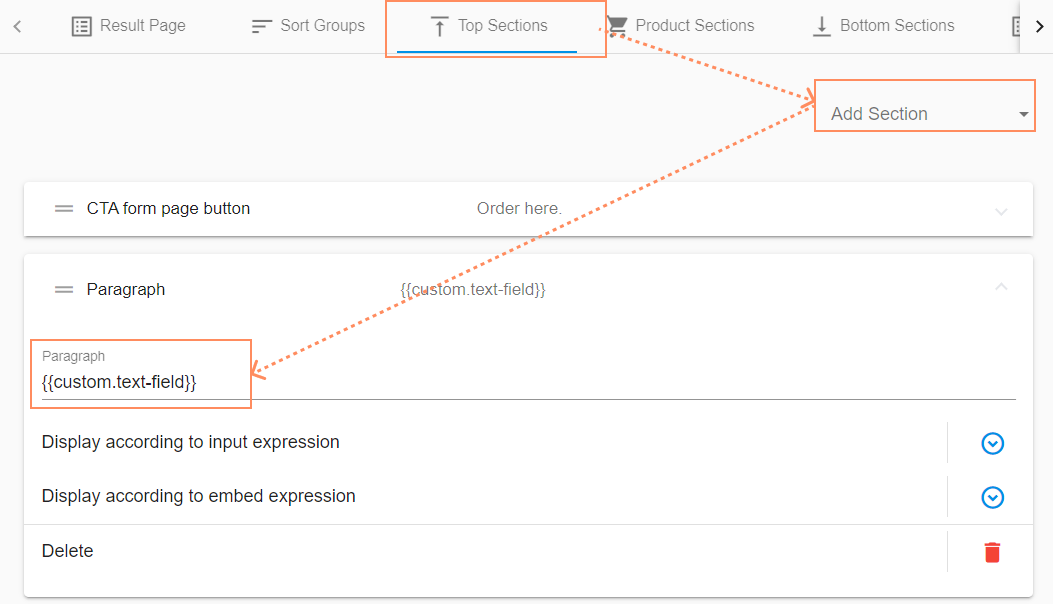
Switch to Result Page in the left workbench navigation.
Open Top or Bottom Sections.
Click on Add Section and select the Paragraph option.
Open Paragraph and enter a field name in the format {{custom.your-name}} (Example: {{custom.text-field}}.

Save the selector.
Open the selector and call up the result page. You can now see the configured sentence in the section in which you have inserted the paragraph (Top Section or Bottom Section)
1.2.2 Show global field as part of the product recommendations (Product Sections)
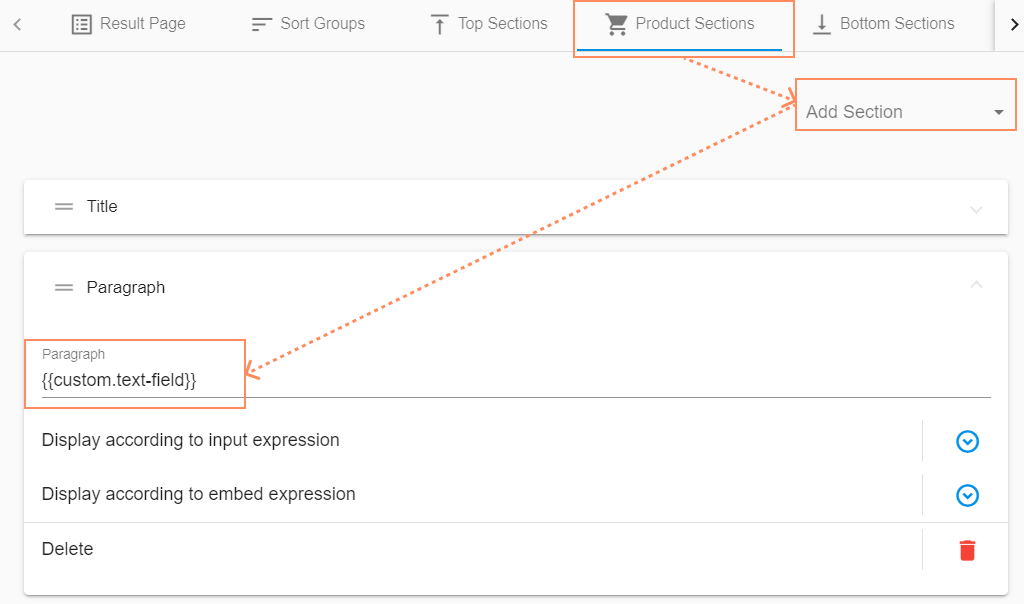
Switch to Result Page in the left workbench navigation.
Open Product Sections.
Click on Add Section and select the Paragraph option.
Open Paragraph and enter a field name in the format {{custom.your-name}} (Example: {{custom.text-field}}.

Save the selector.
Open the selector and call up the result page. You can now see the configured set as part of the product section.
2. Configure product-specific field
2.1 Create product-specific field
Rule: The platform generates the text field with the following content for each product If you have any questions about the product, please contact our service department.
.png)
Open the rule and click on Logic in the right-hand navigation.
Drag the element do into the workspace.
Switch to Loop in the navigation and drag the for-each-item element next to do.
Type product in the item field.
Switch to Variables in the navigation and drag the get element next to product.
Type products in the get field.
Switch to Fields in the navigation and drag the set-of-to element next to the do element.
Next to set, type the name of the new field that you want to display on the result page (example: new-text-field). Enter product in the field next to of.
Switch to Text in the navigation and drag the My text element next to the set-new-text-field-of-product-to element.
Enter the text to be displayed for each product in the My text field (example: If you have any questions about the product, please contact our service department).
2.2 Show product-specific field on the result page
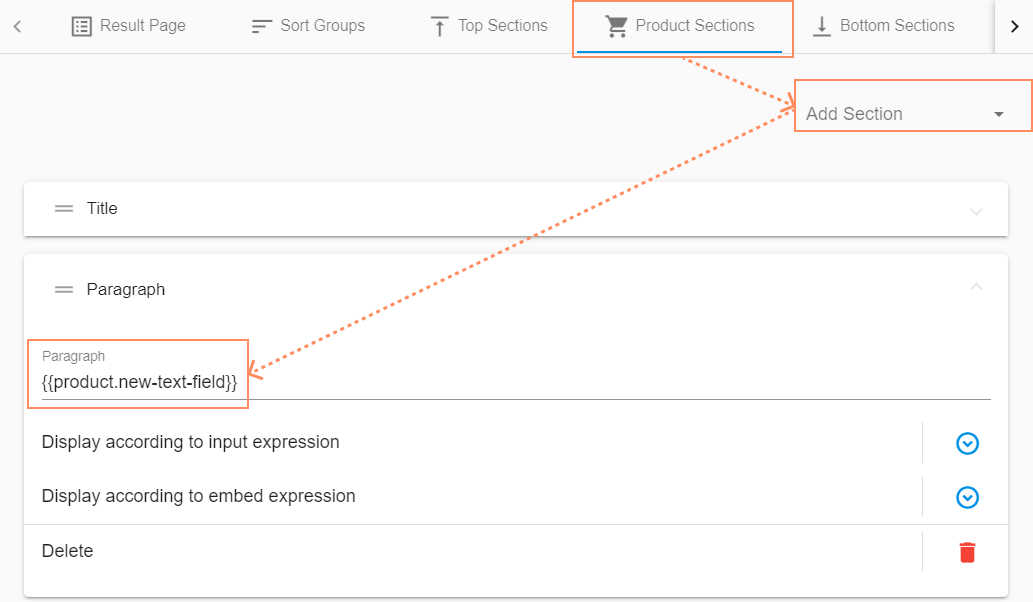
Switch to Result Page in the left workbench navigation.
Open Product Sections.
Click on Add Section and select the Paragraph option.
Open Paragraph and enter a field name in the format {{product.your-name}} (Example: {{product.new-text-field}}.

Save the selector.
Open the selector and call up the result page. You can now see the configured sentence as part of the product section.

